• Skip to primary navigation
  • Skip to main content
  • Skip to primary sidebar
  • Skip to footer

SuperTekBoy

Practical Help for Exchange & Office 365

  • Exchange
    • News
    • Tutorials
    • Solve a Problem
  • Office 365
    • News
    • Tutorials
    • Solve a Problem
  • Outlook
    • Tutorials
    • Solve a Problem
  • Books
  • Podcasts
  • Quick Links…
    • Generate or Renew SSL Certs for Exchange
    • Connect PowerShell to Exchange Online
    • Connect PowerShell to Office 365
    • Extend Schema for Exchange
    • Exchange Schema & Build Numbers
  • More…
    • Kemp Load Balancers
    • Other tech…
    • Videos
    • About SuperTekBoy
    • Contact Us

Exchange H1 2023 Cumulative Updates

July 12, 2023 By Gareth Gudger Leave a Comment

Share
Tweet
Share
Exchange 2019 CU13

In May, Microsoft released a cumulative update for Exchange 2019. Once you get the H1 2023 cumulative update, be sure to grab the security updates released in June.

While Exchange 2016 did not receive a cumulative update, it did get a June security update, so be sure to install it.

Exchange 2013 did not get any updates as it is officially out of support. If you are on Exchange 2013, you should upgrade to Exchange 2019 or migrate to Exchange Online. No future security updates are planned for Exchange 2013.

If you need guidance on migrating from a specific CU to the latest, check out Microsoft’s Exchange Update Wizard for step-by-step instructions.

The updates are as follows:

Exchange Logo Mini

Exchange 2019:
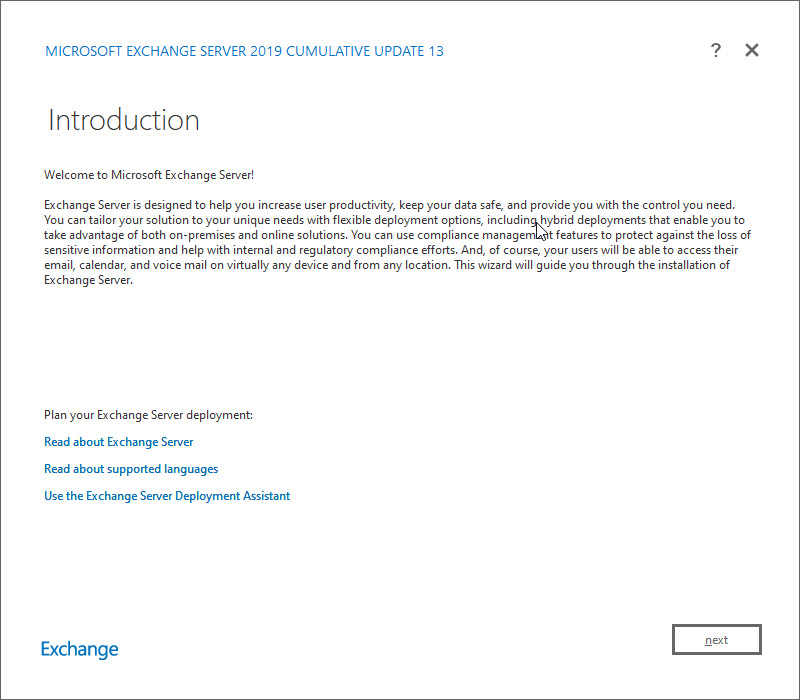
Cumulative Update 13 (KB5020999) | June 2023 Security Update (for CU13)

Exchange 2013 Cumulative Update 9

Exchange 2016:
No new cumulative update | June 2023 Security Update (for CU23)

Exchange 2013 is out of extended support

Exchange 2013 exited extended support on April 11th, 2023. This means that there are no more security patches or technical support for these products. Any security patches after April 11th, 2023, are at Microsoft’s discretion. At the time of writing, the last update for Exchange 2013, is the March 14th, 2023 security update.

Due to the lack of security patches, it is imperative to upgrade these products to either Exchange 2019 or Exchange Online as soon as possible. For more information on how to migrate to Exchange 2019 or Exchange Online, check out Microsoft’s deployment guides here.

Modern Authentication

Cumulative Update 13 adds native OAuth2.0 support to Exchange 2019. Previously if you wanted to leverage modern authentication with Exchange 2019, you had to establish hybrid connectivity with Exchange Online and implement Hybrid Modern Authentication.

This update removes that requirement allowing you to implement modern auth with entirely on-premises technologies. To implement native modern auth in Exchange 2019, you will need to meet the following requirements:

  • Exchange 2019 CU13 or later
  • Active Directory Federation Services 2019 (ADFS 2019) or later
  • Outlook for Windows (Version 2304 – Build 16327.20214) running on Windows 11 (Version 22H2 with KB5023706 installed)
  • Outlook on the Web

Note: Modern auth support for Outlook for Mac, Outlook Mobile, and native mail apps will be added in a later update. At the time of writing, these clients will continue to use basic auth to connect to Exchange 2019.

Enabling modern auth, either through native modern authentication or hybrid modern authentication, greatly increases the security posture of Exchange on-premises. With native modern auth, organizations leveraging Exchange on-prem can utilize ADFS as their identity provider. This allows for multi-factor authentication, smart card authentication, certificate-based authentication, and integration with third-party authentication providers.

For more information on deploying native modern authentication for Exchange 2019, check this article.

[Read more…] about Exchange H1 2023 Cumulative Updates
Print Friendly, PDF & Email

Filed Under: Exchange Solutions

Renew a Certificate in Exchange 2016 & 2019

July 8, 2023 By Gareth Gudger 19 Comments

Share
Tweet
Share

How to renew a certificate in Exchange

This article explores renewing a third-party certificate in Exchange 2016 CU23 and greater and Exchange 2019 CU12 and greater. This process differs from the older cumulative updates (and Exchange 2013), where renewing a third-party certificate through the Exchange Admin Center (GUI) was still possible.

If you are still on Exchange 2013 or older versions of Exchange 2016 or Exchange 2019, consider using this article instead for the Exchange Admin Center method.

Note: Using the Exchange Admin Center to generate and renew self-signed certificates is still possible. Self-signed certificates are out of the scope of this article.

This article demonstrates how to accomplish this using the PowerShell commands. The high-level steps include:

  • Create a new certificate signing request
  • Upload the certificate signing request to your certificate provider
  • Download the processed certificate from your certificate provider
  • Install the certificate on Exchange
  • Assign Exchange services to the new certificate on each server
  • Delete the old certificate
  • Export the new certificate to a PFX file
  • Import the certificate to all other Exchange servers

Let’s get started!

Renew a Certificate with PowerShell

As mentioned earlier, newer versions of Exchange 2016 and Exchange 2019 require that third-party certificate requests be conducted through PowerShell. Third-party certificate requests can no longer be requested or renewed through the Exchange Admin Center.

To start, launch the Exchange Management Shell (either from the Exchange Server or a workstation that has the Exchange Management Tools installed).

First, we need to find the thumbprint of the certificate we plan to renew. To do this, we can run the Get-ExchangeCertificate command and filter the responses to only certificates that are issued by a third-party certificate authority.

 C:\> Get-ExchangeCertificate | Where {$_.IsSelfSigned -eq $false} | Format-List FriendlyName, CertificateDomains, Thumbprint, NotAfter

This will return all certificates that are not self-signed. In our example, we see just a single certificate returned. This certificate is named mail.exchangeservergeek.com and has a corresponding thumbprint. This is the certificate we will be renewing.

FriendlyName : mail.exchangeservergeek.com
CertificateDomains : {mail.exchangeservergeek.com, autodiscover.exchangeservergeek.com}
Thumbprint : B26C3C9B30A2A7371767275043816466CB921738
NotAfter : 7/15/2023 12:00:00 AM

Now that we have the thumbprint, let’s renew the certificate. To do this, we will pipe the thumbprint using the Get-ExchangeCertificate command into the New-ExchangeCertificate command. We will then save the output of New-ExchangeCertificate into a variable named $certrequest.

 C:\> $certrequest = Get-ExchangeCertificate -Thumbprint B26C3C9B30A2A7371767275043816466CB921738 | New-ExchangeCertificate -GenerateRequest -PrivateKeyExportable:$true

The example above leverages the following parameters:

  • Thumbprint identifies the certificate we plan to renew.
  • GenerateRequest is used to generate a certificate request for a third-party certificate authority. Without this parameter, you would generate a self-signed certificate issued by the Exchange Server.
  • PrivateKeyExportable allows you to copy this certificate to other Exchange Servers. If you have multiple Exchange Servers, you need this parameter set to $true. If you omit this parameter (or set it to $false), you can only use this certificate on the Exchange Server that generated the certificate request.

Now that we have the Exchange certificate stored in a variable, we need to get that variable saved into a file. To do that, run the following command.

 C:\> [System.IO.File]::WriteAllBytes('\\EX19-01\C$\Users\<user>\Desktop\certrequest.txt', [System.Text.Encoding]::Unicode.GetBytes($certrequest))

In this command, two things are important. First, you must specify a UNC path to where you want to save the certificate request file. In our example, we saved this to our desktop as a text file named certrequest.txt. The second is what we are exporting into that file. In this case, it is the contents of the variable $certrequest. When you run this command, the file will be created in the specified location.

By running the following command, you will notice we have two certificates with the name mail.exchangeservergeek.com; however, one of these will be in a Pending Request state. The duplicate minimizes downtime for your users because it allows you to process the certificate renewal without affecting the existing certificate.

 C:\> Get-ExchangeCertificate | Format-Table Subject, Status

Subject                                                 Status
-------                                                 ------
CN=mail.exchangeservergeek.com                  PendingRequest
CN=mail.exchangeservergeek.com                           Valid
CN=EX19-01                                               Valid
CN=Microsoft Exchange Server Auth Certificate            Valid
CN=WMSvc-SHA2-EX19-01                                    Valid
[Read more…] about Renew a Certificate in Exchange 2016 & 2019
Print Friendly, PDF & Email

Filed Under: Exchange Tutorials

Import & Export SSL Certificates in Exchange 2016 and Exchange 2019

July 7, 2023 By Gareth Gudger 4 Comments

Share
Tweet
Share

If you have multiple Exchange servers, it is imperative that each server have a valid third-party certificate reflecting the namespace. If you don’t, some client connections will get certificate errors.

In our example below, we have two Exchange 2019 servers behind a load balancer in a single site; EX19-01 and EX19-02. Our third-party certificate request was generated and completed on EX19-01. We have also assigned services to that certificate. However, that certificate does not yet exist on EX19-02. Only the default out-of-the-box certificates exist on EX19-02.

When user Amy Pond connects, she is load balanced to EX19-01, which has a third-party certificate. The certificate matches the namespace. Her connection is established without error. On the other hand, when Rory Williams connects, he is load balanced to EX19-02. EX19-02 returns its self-signed certificate. This certificate does not match the namespace. Rory receives a security error.

SSL Certificate Error Exchange 2019

In this article, we explore transferring a third-party SSL certificate from one Exchange server to another using PowerShell. This process differs from the older cumulative updates (and Exchange 2013), where it was still possible to complete a third-party certificate request through the Exchange Admin Center (GUI).

If you are still on Exchange 2013, or older versions of Exchange 2016 or Exchange 2019, consider using this article instead for the Exchange Admin Center method.

Let’s get started!

[Read more…] about Import & Export SSL Certificates in Exchange 2016 and Exchange 2019
Print Friendly, PDF & Email

Filed Under: Exchange Tutorials

Assign Services to a Certificate for Exchange 2016 and Exchange 2019

July 6, 2023 By Gareth Gudger 1 Comment

Share
Tweet
Share

In previous articles, we generated and completed a certificate request. Keep in mind that despite the request being completed, it is not yet live. We must still assign services to that certificate.

In this article, we explore the process of assigning services to a third-party certificate for Exchange 2016 CU23 and greater and Exchange 2019 CU12 and greater. Unlike the previous articles, where this process was only available in PowerShell, assigning services is still available in the Exchange Admin Center. In this article, we will cover both methods of assigning services to a certificate.

Let’s get started!

Note: When you assign services to a certificate, it will impact current connections to Exchange. For example, assigning IIS to a certificate can cause Outlook clients to reconnect. You may wish to perform this action during a maintenance window or after hours.

Assign Services to a Certificate with Exchange Admin Center

Log in to the Exchange Admin Center (EAC). Select the Servers tab and Certificates sub-tab.

Exchange 2019 Certificates

Select your certificate and click the Edit (Edit button) button.

Exchange 2019 Certificates Selected
[Read more…] about Assign Services to a Certificate for Exchange 2016 and Exchange 2019
Print Friendly, PDF & Email

Filed Under: Exchange Tutorials

Complete a Certificate Request for 2016 and Exchange 2019

July 6, 2023 By Gareth Gudger Leave a Comment

Share
Tweet
Share

In a previous article, we examined the process of generating a certificate request for Exchange 2019. We then submitted that request to a certificate provider. Now that the certificate provider has validated our identity and issued our certificate, we are ready to move on to the next step.

In this article, we explore how to complete our certificate request using PowerShell. This process differs from the older cumulative updates (and Exchange 2013), where it was still possible to complete a third-party certificate request through the Exchange Admin Center (GUI).

If you are still on Exchange 2013, or older versions of Exchange 2016 or Exchange 2019, consider using this article instead for the Exchange Admin Center method.

Let’s get started!

Note: It is still possible to use the Exchange Admin Center to generate and renew self-signed certificates. Self-signed certificates are out of the scope of this article.

Complete a Certificate Request with PowerShell

As mentioned earlier, newer versions of Exchange 2016 and Exchange 2019 require that third-party certificate requests be completed through PowerShell. Third-party certificate requests can no longer be requested or renewed through the Exchange Admin Center.

To start, launch the Exchange Management Shell (either from the Exchange Server or a workstation that has the Exchange Management Tools installed).

To complete our pending certificate, we need to leverage the Import-ExchangeCertificate command. In our example below, the Import-ExchangeCertificate command is leveraging the following parameters.

 C:\> Import-ExchangeCertificate -FriendlyName mail.exchangeservergeek.com -FileData ([System.IO.File]::ReadAllBytes('\\EX19-01\C$\Users\<user>\Desktop\mail_exchangeservergeek_com.cer')) -PrivateKeyExportable $true
  • FriendlyName is purely for display. It identifies how you want the certificate to appear in the Exchange Admin Center and PowerShell. It is beneficial to put something descriptive in this field. If you omit this field, Exchange names the certificate “Microsoft Exchange”. In our example above, we made the friendly name the same as the subject name.
  • FileData is the UNC path to the certificate we downloaded from the certificate authority. In our example, we saved this to our desktop for easy access.
  • PrivateKeyExportable allows you to copy this certificate to other Exchange Servers. If you have more than one Exchange Server, you need this parameter set to $true. If you omit this parameter (or set it to $false), you can only use this certificate on the Exchange Server that generated the certificate request.
[Read more…] about Complete a Certificate Request for 2016 and Exchange 2019
Print Friendly, PDF & Email

Filed Under: Exchange Tutorials

Generate a Certificate Request for Exchange 2016 and Exchange 2019

July 6, 2023 By Gareth Gudger 1 Comment

Share
Tweet
Share

In this article, we explore the process of generating a certificate request to obtain a third-party certificate for Exchange 2016 CU23 and greater and Exchange 2019 CU12 and greater. This process differs from the older cumulative updates (and Exchange 2013), where it was still possible to generate a third-party certificate request through the Exchange Admin Center (GUI).

If you are still on Exchange 2013, or older versions of Exchange 2016 or Exchange 2019, consider using this article instead for the Exchange Admin Center method.

In future articles, we will explore completing that request, assigning services to the certificate, and importing that certificate to other Exchange servers.

Let’s get started!

Note: It is still possible to use the Exchange Admin Center to generate and renew self-signed certificates. Self-signed certificates are out of the scope of this article.

How to generate a certificate request in PowerShell

As mentioned earlier, newer versions of Exchange 2016 and Exchange 2019 require that third-party certificate requests be conducted through PowerShell. Third-party certificate requests can no longer be requested or renewed through the Exchange Admin Center.

To start, launch the Exchange Management Shell (either from the Exchange Server or a workstation that has the Exchange Management Tools installed).

The first command we run stores the output of New-ExchangeCertficate into the variable $certrequest.

 C:\> $certrequest = New-ExchangeCertificate -GenerateRequest -FriendlyName mail.exchangeservergeek.com -SubjectName "c=US,o=Exchange Server Geek,cn=mail.exchangeservergeek.com" -DomainName autodiscover.exchangeservergeek.com -PrivateKeyExportable $true

The example above is leveraging the following parameters:

  • GenerateRequest is used to generate a certificate request for a third-party certificate authority. Without this parameter, you would generate a self-signed certificate issued by the Exchange Server.
  • FriendlyName is purely for display. It identifies how you want the certificate to appear in the Exchange Admin Center and PowerShell. It is beneficial to put something descriptive in this field. If you omit this field, Exchange names the certificate “Microsoft Exchange”. In our example below, we made the friendly name the same as the subject name.
  • SubjectName is the primary certificate name. This is represented as “cn=mail.exchangeservergeek.com” in our example above and is the name that is most visible to end-users. It also contains other fields that you want to appear on the certificate, such as the country code or organization name. In our example, we list the United States as “c=US” and an organization as “o=Exchange Server Geek”.
  • DomainName is any subject alternative name you need to appear on this certificate. This is common for Exchange, and as we show in our example above, we are adding autodiscover.exchangeservergeek.com with this parameter. This means our certificate will be valid for both mail.exchangeservergeek.com and autodiscover.exchangeservergeek.com.
  • PrivateKeyExportable allows you to copy this certificate to other Exchange Servers. If you have more than one Exchange Server, you need this parameter set to $true. If you omit this parameter (or set it to $false), you can only use this certificate on the Exchange Server that generated the certificate request.
[Read more…] about Generate a Certificate Request for Exchange 2016 and Exchange 2019
Print Friendly, PDF & Email

Filed Under: Exchange Tutorials

  • Page 1
  • Page 2
  • Page 3
  • Interim pages omitted …
  • Page 51
  • Go to Next Page »

Primary Sidebar

Want to stay up to date?

Sidebar Form

Join thousands of IT professionals and get the latest Exchange & Office 365 tips and tutorials direct to your inbox

DigiCert Banner 300x348

(help support us using our affiliate link)

Footer

Site Navigation

  • Subscribe to blog
  • About SuperTekBoy
  • Disclaimer
  • Privacy & Cookies
  • Contact Us

Want to stay up to date?

Footer Form

Join thousands of IT professionals and get the latest Exchange & Office 365 tips and tutorials direct to your inbox

Join the conversation

  • Twitter
  • LinkedIn
  • Facebook
  • YouTube
  • RSS

Copyright © 2025 · SuperTekBoy LLC